My Plan
When heading into this assignment it took me a while to figure out exactly what I want to create with the themes and sub- themes given, I knew definitely that I was want to create a scene which was as realistic as I could possibly make, this is due to the fact I believe creating realistic art is more impressive and embracive for the viewer however with my current skills going into this project I felt that it would be effective to create something quite old and creepy as I feel I can create effective models that look old and use and which basically show some character. Therefore with my current skills and what I like doing in mind the themes I chose to follow heading into this scene were; horror as a main theme and dystopia as the sub-theme. Now I had these to themes in mind I needed to start formulating a base line idea, using horror it is quite easy falling into the stereotypes of basic horror settings for example a grave yard, or a creepy hallway saying that i wanted to create some sort of a cabin or cottage as I feel there is a lot of detail and story u can push into the texturing and details of the models, like the ageing, wear and the what had happened to the place in the past and having to put the Winchester rifle as the focal point of the scene this idea of a cottage was coming together. Making the scene link with my sub-theme was something I wanted to only hint at during the the recording just to push a slight story line behind the cottage, the idea for this was showing people or a group of people breaking in and trying to find something, maybe have things broken, moved, vandalised ect. How I aimed to actually create this scene was firstly modelled within maya and put altogether to see if it works, theme send over each model to substance painter which is where id texture the models for the scene, next to be in unreal engine to be put together and made a cinematic.
Process
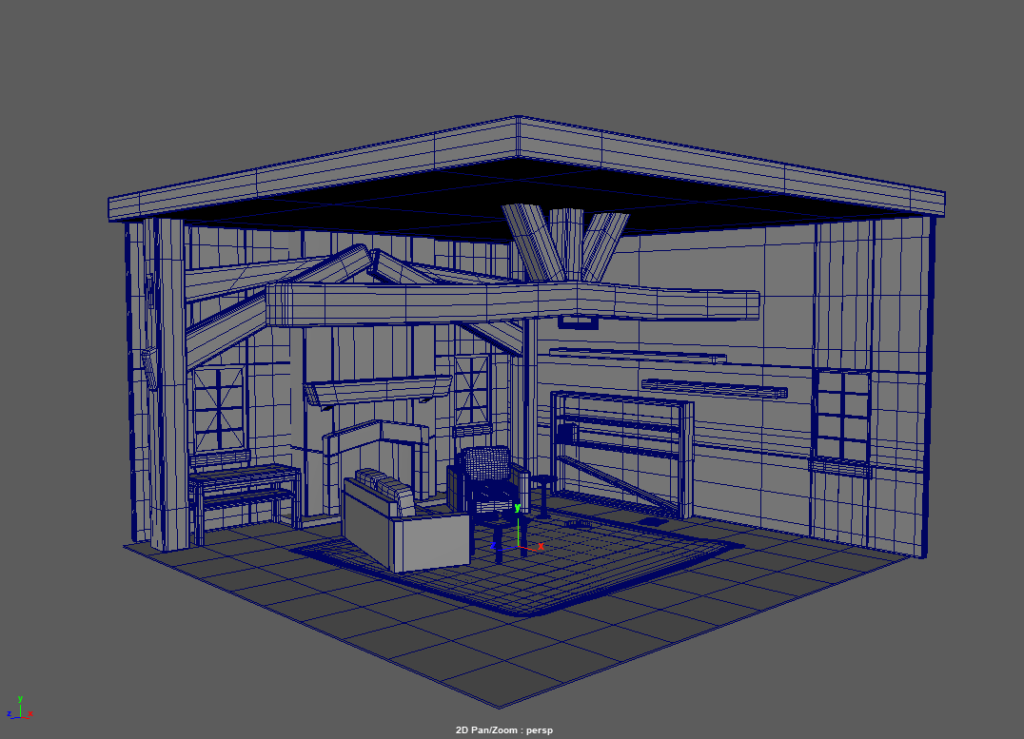
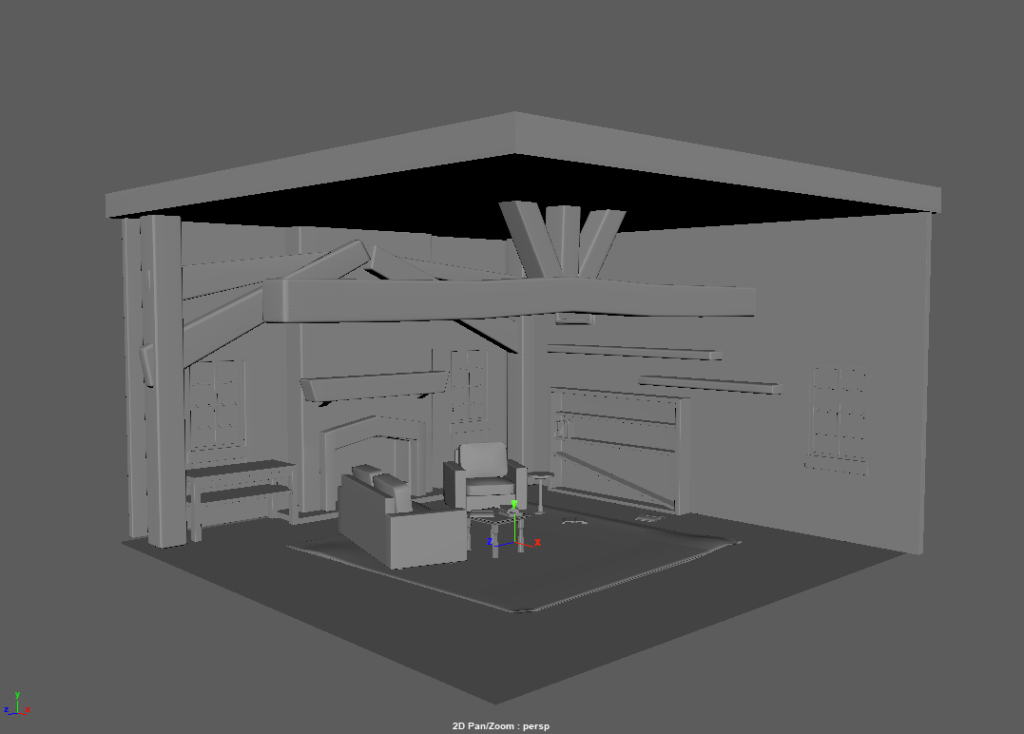
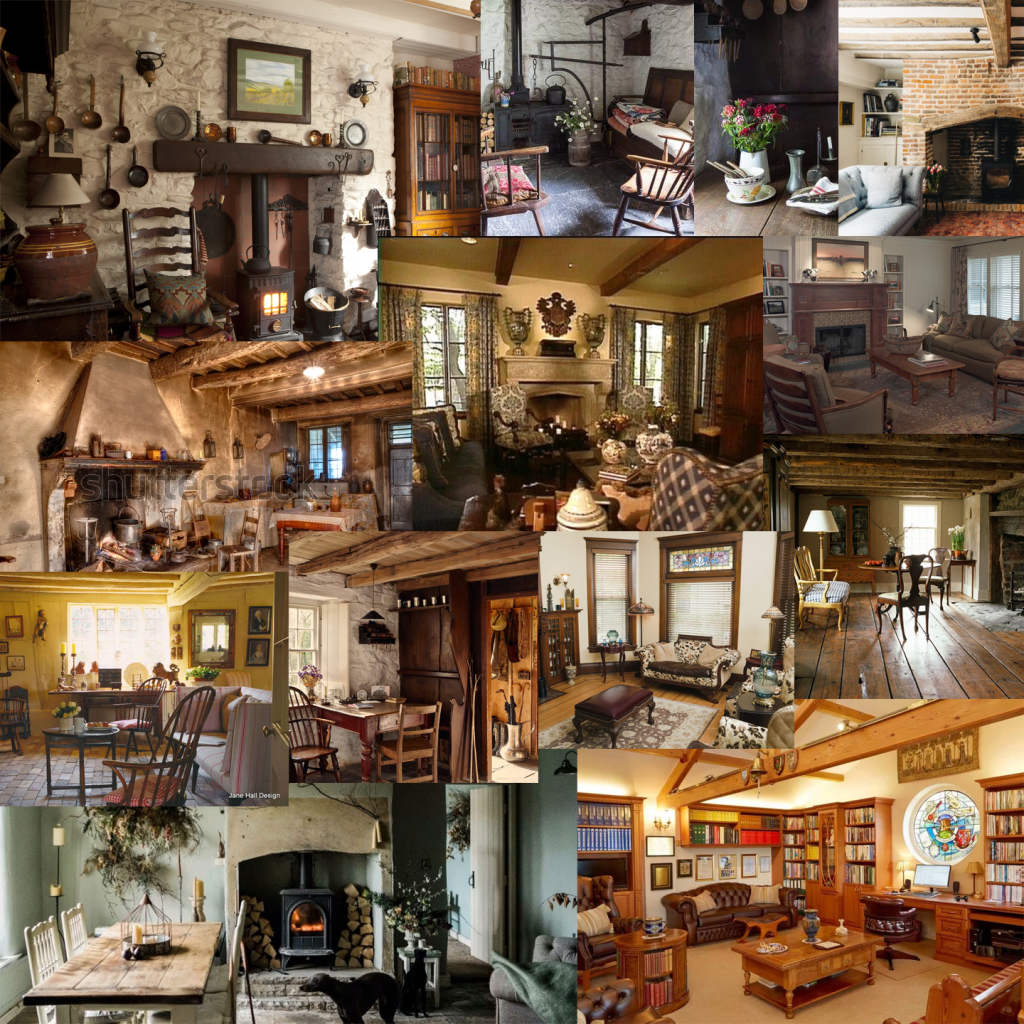
As started in the plan I went to modelling the scene was going to be done in the in maya, My first stage of this however was done by creating the first picture collage (which is found further down the page), the collage really helped give me and understanding and idea of what i actually wanted to implement into my scene, as you can see from theme images on the first collage they are really homely and cosy which is an aspect in which i wanted to tap into slightly just to remind the viewer that this place was once a home for someone therefore a used fireplace, bookshelf, couches, a rug the very basic home items i wanted to bring into the scene, however things like flowers, family pictures and other more meaning full things you would find in a family household i wanted to avoid, this was because i wanted to relate to the horror and dystopia themes and create the questions like, who did live hear? what happened hear, where is everyone else? and these questions create an unpleasant feeling and atmosphere.
In maya making each and every asset had a process of how I went about creating them, this was as follows; once i had understood what I wanted to create I this being one of the items you can see in the scene displayed above, what I did is figured out what the item is make up for, for example the small square table by the couch, from references of tables they are usually made from five objects, four legs and the table top this is so i know how many objects i will have to use to create it, for the legs like everything else I used a range of different tools to manipulate the legs into position such as move tool, extrude tool which is what i used to move the vertices, edges and faces. this first modelling stage would be cased as the block out stage, where i am just gaining the general shape of the object, this is done for a couple of reasons such as if I don’t actually like how it will look or it doesn’t fit in with the scene i haven’t wasted too long on something useless and it does help process faster to the other stages.
After blocking out the particular object in the scene, this is where I start to add the more unique details to the model, sticking with the table example, I noticed that a lot of tables or old style tables had quite interesting styled and sculpted legs, using tools like bevelling edges and previous ones I’ve discussed are really helpful pulling this off, they’re are a really simple and effective way to smoothen and sharpen a particular selected part of a modelled. during this I was more interested in the old style of furniture because I still had to keep the idea of the theme in my mind and through my research and picture collage cottages and generally the style of room I was aiming to replicate had furniture which resembled quite old and vintage looking objects that I always felt would help create a creepy atmosphere for the scene. objects in the scene like the rug was slightly confusing to manipulate as I wanted to make it seem stressed and aged, never attempting fabric modelled before I eventually figured I could achieve this by highlighting vertices and rotating them in this way.
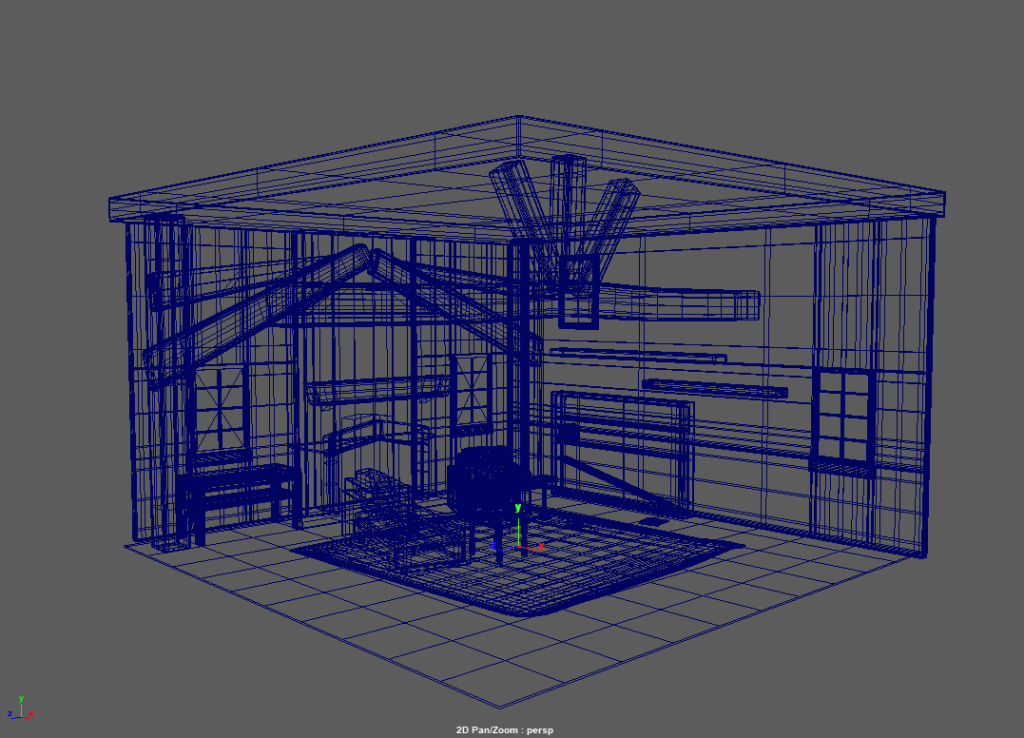
Finishing the modelling stage with the finally part where I had to check the topology to make sure everything looks clean and so no error appear, then start to apply supporting edge loops, this would be in parts I wanted sharper, if I wanted to keep and area more rounded but generally made the model look a lot more believable once I smooth it down which is displaces in the images above. When using the smooth tool there are definitely pros and cons to using it the pros being makes the model look really good and professional if executed correctly if it isn’t it will highlight the errors in the topology of the model however the cons of doing this is it does and can raise the polygon count extremely high as it is increasing the detail amount of the model. So at this stage, all high poly models are finished got to create the low poly models for baking in substance painter this involved me duplicating everything and hand picking out unnecessary details/ edge loops.
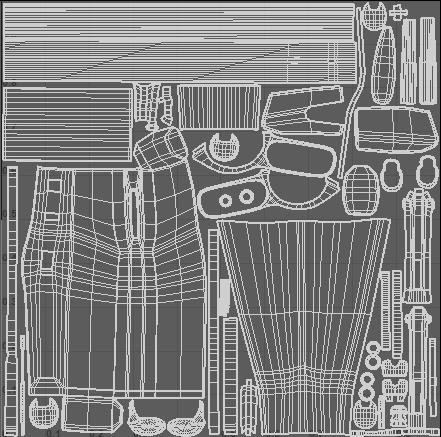
The last part of the work done in maya is potentially the most important in my opinion depending on how well it is produced will dictate the texture quality of the model. Uv editing is basically the 2d unwrapped version of the model you make and had to be done for everything in the scene which you see, items with multiple objects will be grouped together and in the image above the different sections are classed as Uv shells are made by using the cut and unwrap tool in the Uv editor, important to know that all Uv shells should be the same size so that the model doesn’t look odd with different parts with different resolutions. This now is all exported and sent to substance painter to be textured.
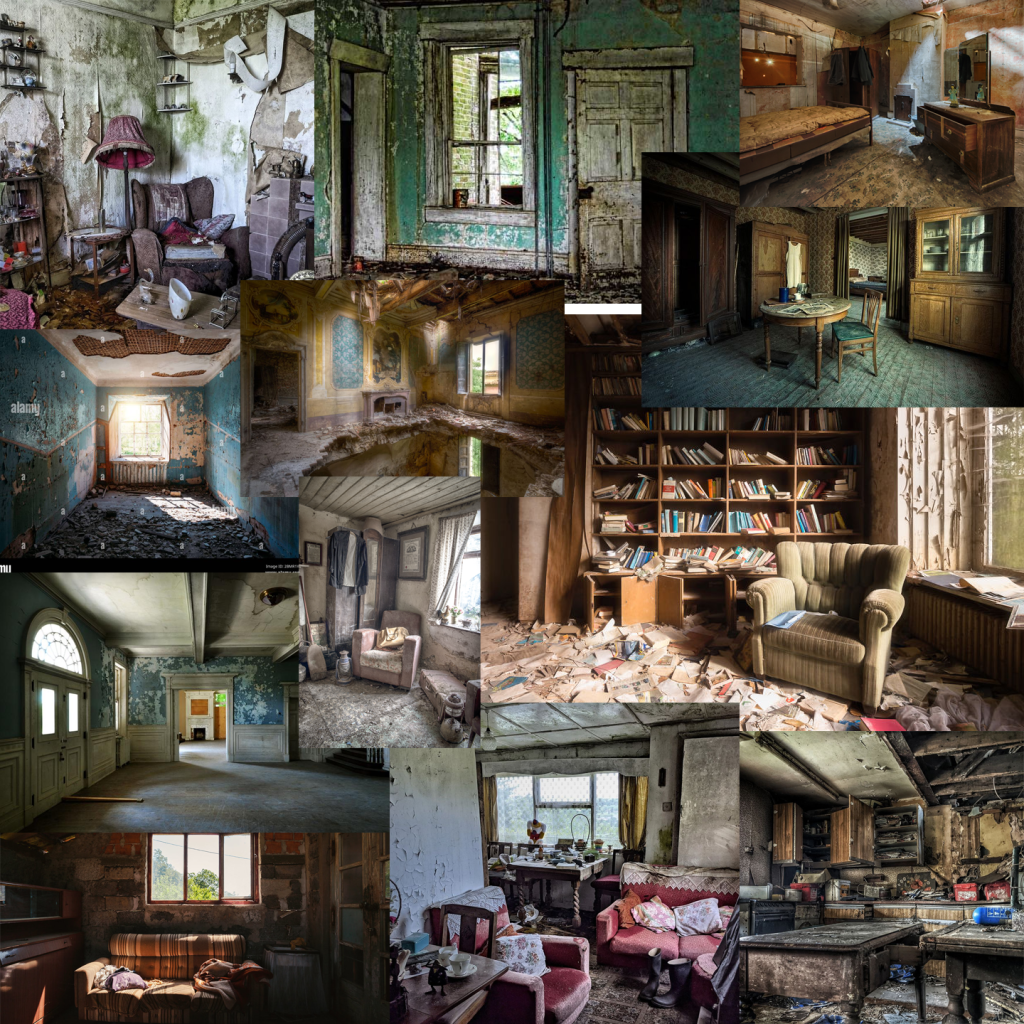
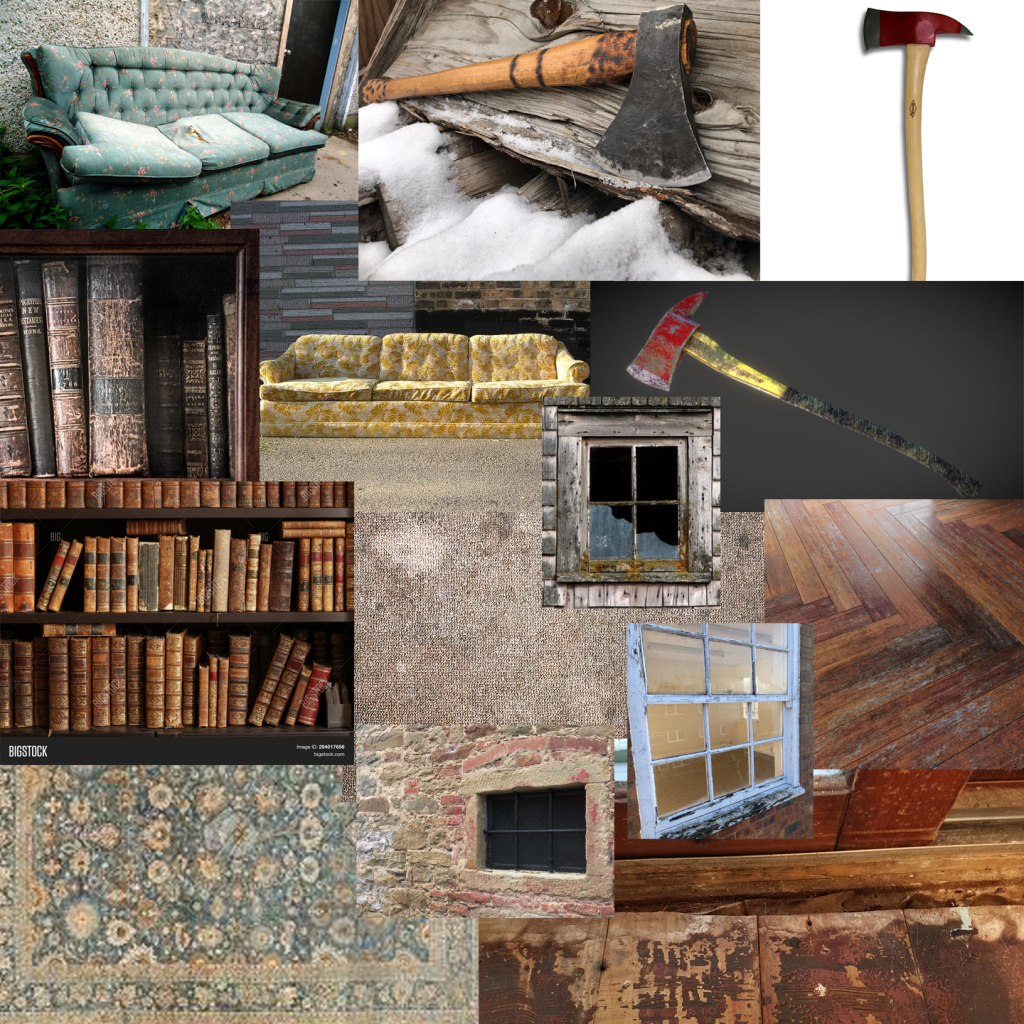
I thought it would be important to mention the collages especially at this stage of the process, however I made the first one for the modelling in particular would be using it throughout the entire development. As mentioned previously the first one helped with the layouts, where and what in particular I want to include in the scene I would also go on to use it for a references of base colours and what I meant by this was the colours that would be there faintly because as this was an old aged room I didn’t want bright vibrant colours so i would usually colour from the wood them lower the opacity, vibrance to bring a more sad, old effect to the model referring to the themes in mind. Moving on to the second image, because my sub- theme was a dystopia a building which had been abandoned or practically destroyed would be useful references, this wasn’t for the exact fact for it being abandoned but the references were for seeing, for example how paint looks once it start peeling from walls, how books look scattered along shelves, the wear on windows, i feel like this collage was primally for the texturing references. The final collage i made was just for the more unique items i had implemented in the scene just for refences of wear and texturing so I could get an accurate representation of them. Later in unreal I would also use these all for understanding how light hit the objects and how light illuminated the rooms.
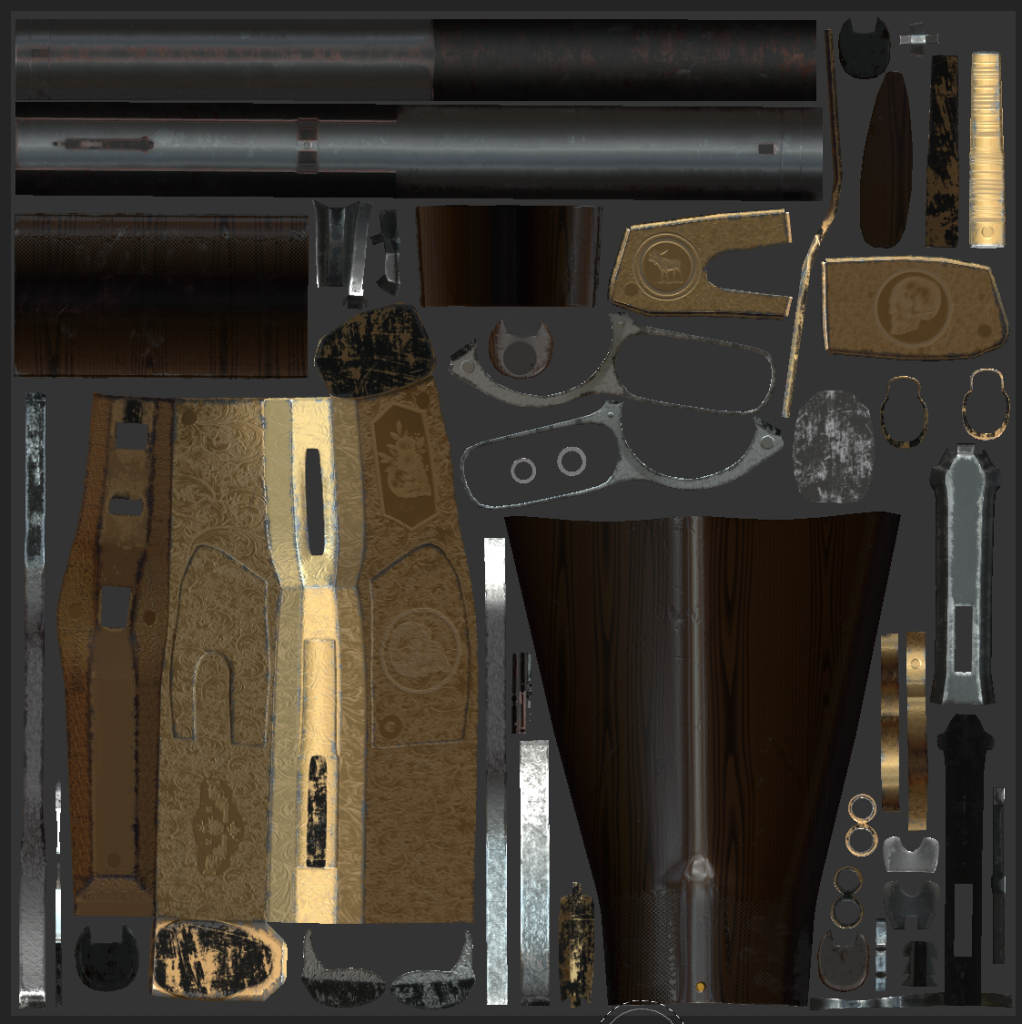
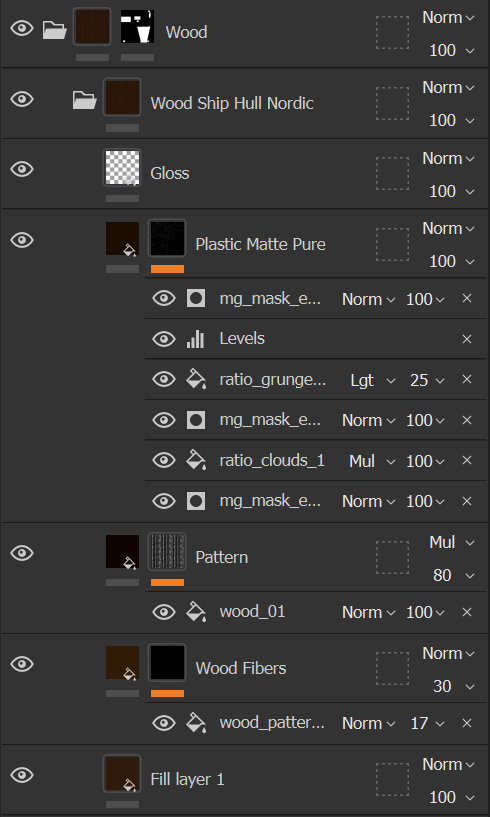
Images above are the textures applied in substances painter in the Uv view and the layers i used to make it, this example is the rifle i textured but I had to do this with every item I wanted in the scene, a lot of modelled i made i wanted to have edge wear and tell some sort of a story, My favourite example of this is the book shelve I made, using base materials and my references to colour pick the wood, and lowing the height on a grunge map so that it makes it look like the wood had slits as it has expanded and shrunk with different temperatures over time, alot of these models i hand drew on dust where I believed it would of formed, the book shelve had it over the top with the use of alphas, and adjusting the opacity to make it seem real, with this model in particular the lower shelve was broken, so rubbed out hand marks in the dust at the top to resemble someone climbing the shelve as if they’re looking for something, aslo applied scrape makes where the shelve would of dropped down on the side of the wood. Adding these stories into the texturing makes them not only more interesting but more realistic.
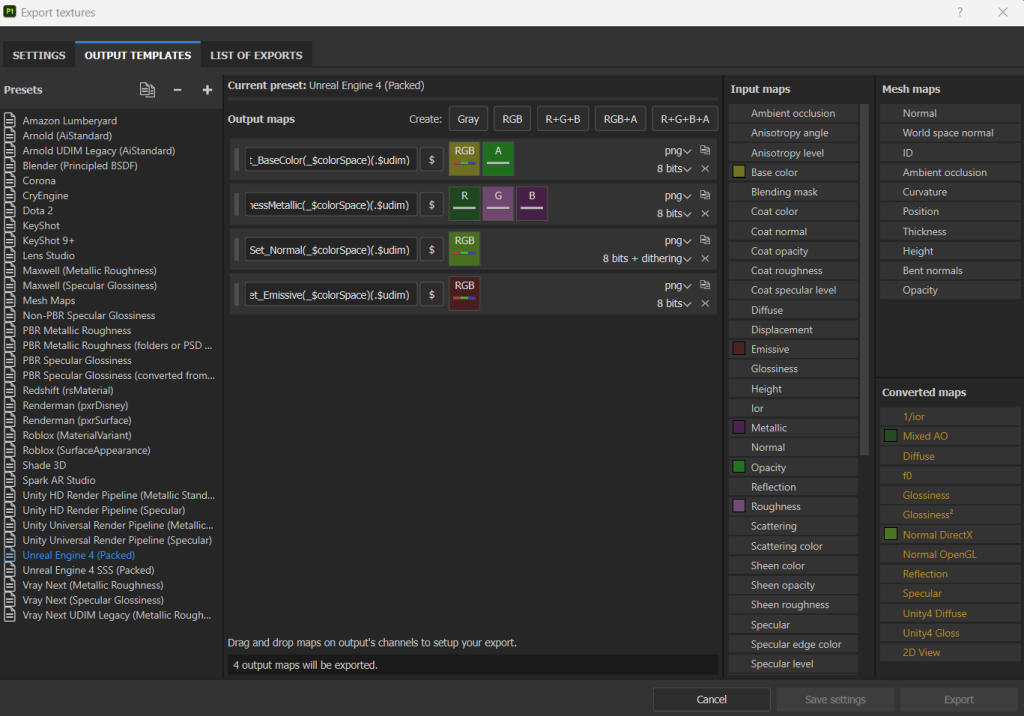
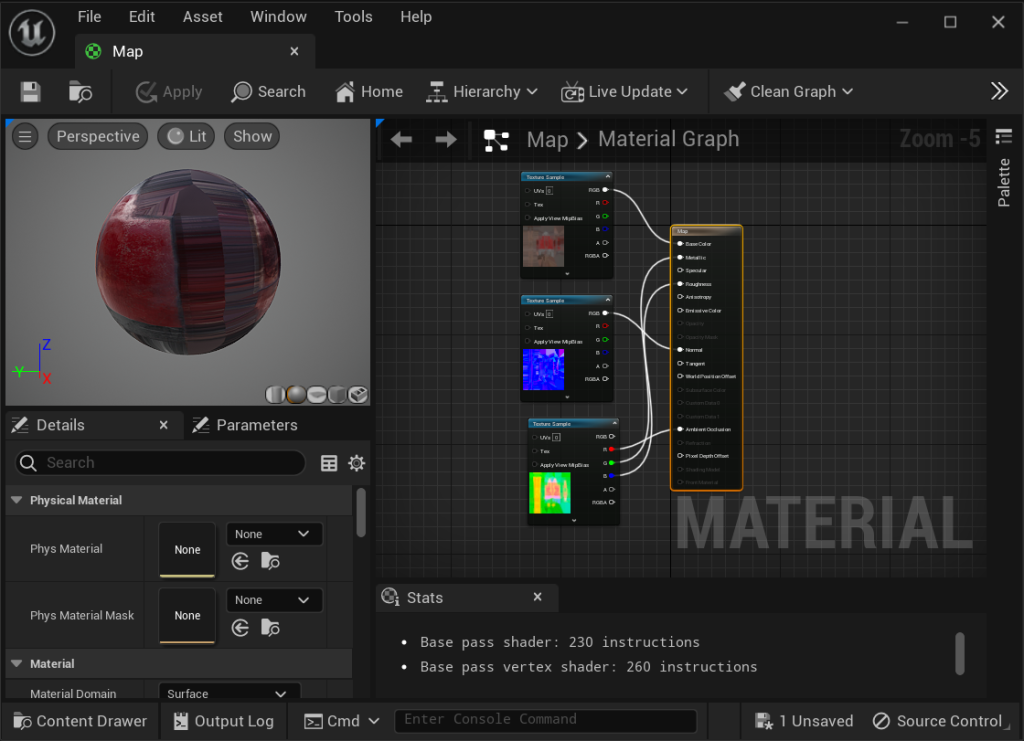
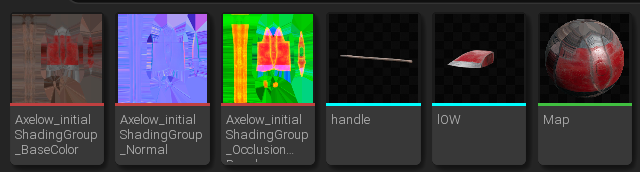
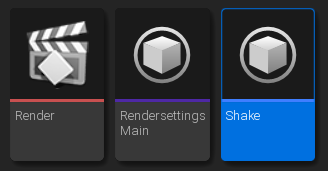

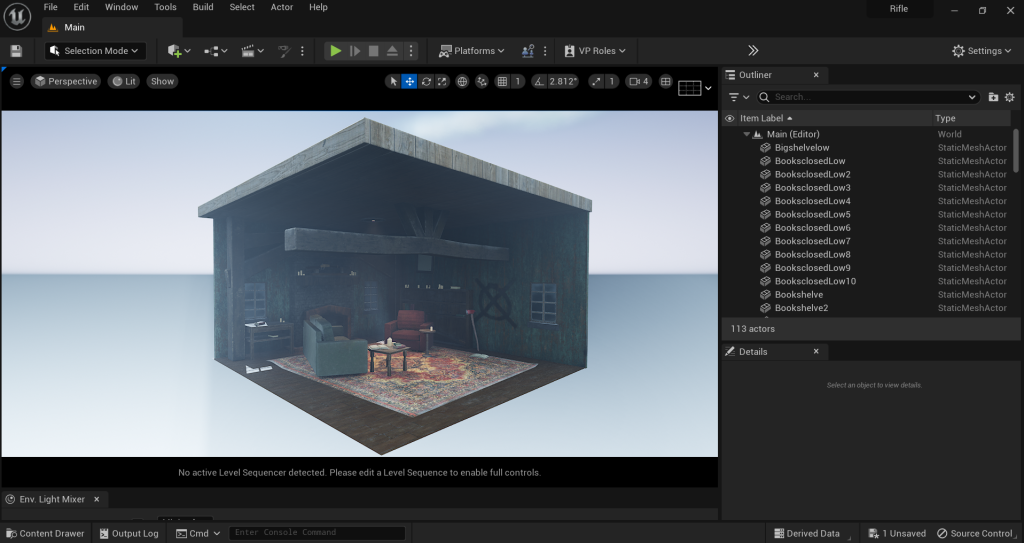
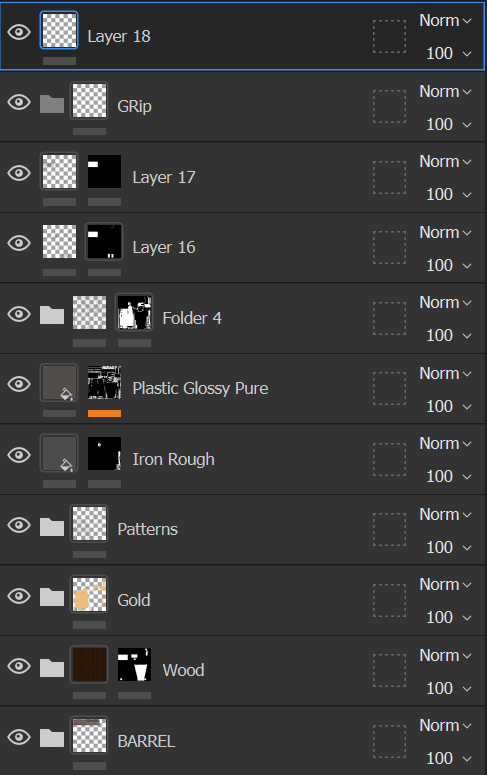
Exporting from substance painter into unreal engine I had to made sure that i was exporting the correct maps otherwise i would be able to apply the textures I just made to my models in the unreal engine which is shown in the image above. The image beside that is once I was in the unreal engine, and is how to apply the colour to the model, what has to be done is applying the correct maps to the specify textures, this I like the base colours, the metallic, the occlusion, the normal map and the roughness all so they can work in real time and this had to be done for everything in the scene, with this in mind it was a good idea to folder each and every asset as you can see in the rectangular image above. Beside that is a small image of the cinematic folder and I think it would be good to explain what is going on in this, the render icon once opened up is the basic cinematic, where the camera is supposed to be and how fast and long it is which is actually shown in the image above. render settings icon is where I altered settings to enhance the quality in which the video will be rendered at so I could get the best possible render I could just so I could push to make it a little more realistic. Fore the shake icon however, this was something I felt pushed the realistic creepiness of the cinematic, what its purpose is to slightly sway the camera and give the illusion of it moving round as if someone was holding it themselves and this helped because without it the cinematic looked ever blocky and robotic and destroyed that creepy feel in the video and you can see I had to apply it just above the key frames in the cinematic.
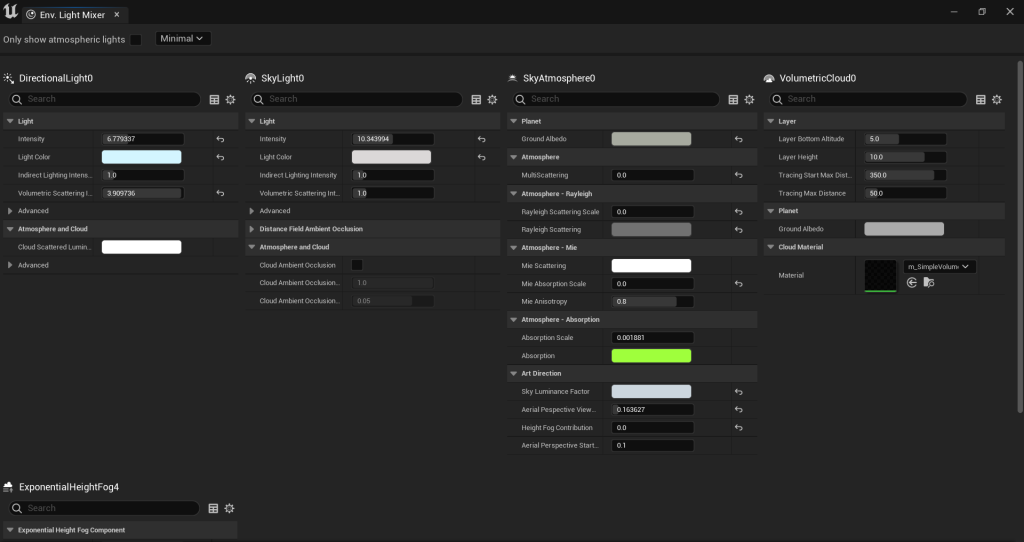
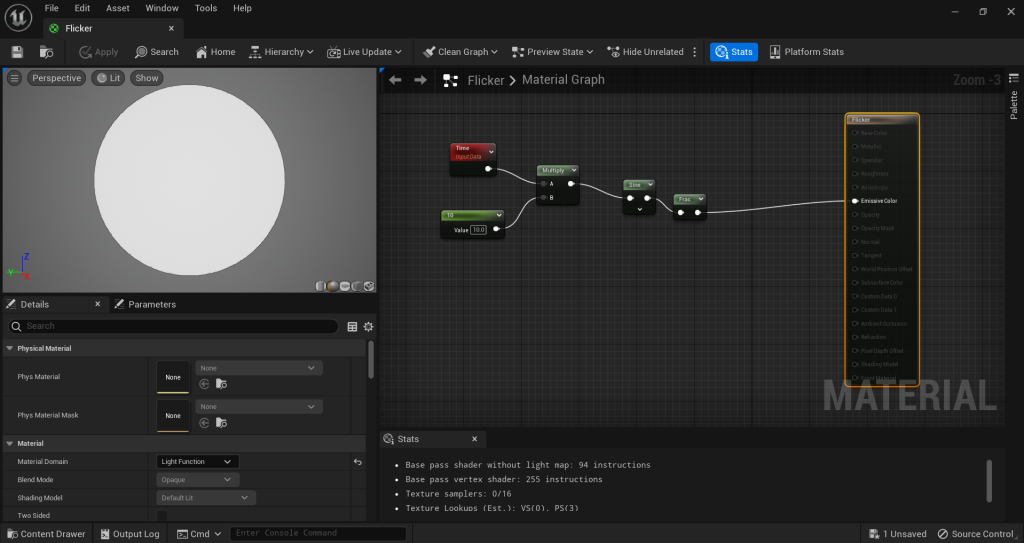
The image above was very helpful in this process because it is the lighting and I believe that the lighting is possibly one of the most important things in a render to make it believable. my aim was to add a moon light effect through the windows to resemble night time obviously night time is scarier than daylight which was my thought process in that aspect how i achieved this ray of light through the window was a technique I’ve seen been called ‘god rays’ which is the use of these settings particularly the fog, strengthen it enough for the directional light to capture it, took a while trying to angle the light to give off the exact effect i was aiming for. To tie in all of the lights and give a different colour over the centre of the scene i added a spot light to resemble just a standard light in a living room but i felt like this wasn’t exactly matching the horror/ dystopia feel i had running through the scene, as you see on the right image i made a code to make the light randomly flicking as if there was some malfunction and someone hadn’t changed it or wasn’t there to which i felt gave a different aspect to the scene and made it come to life. In this bit of code i was able to alter the speed in which it flickered knowing this i didnt want it to draw much attention from the scene itself so i altered it to the degree you can just make out it was flickering
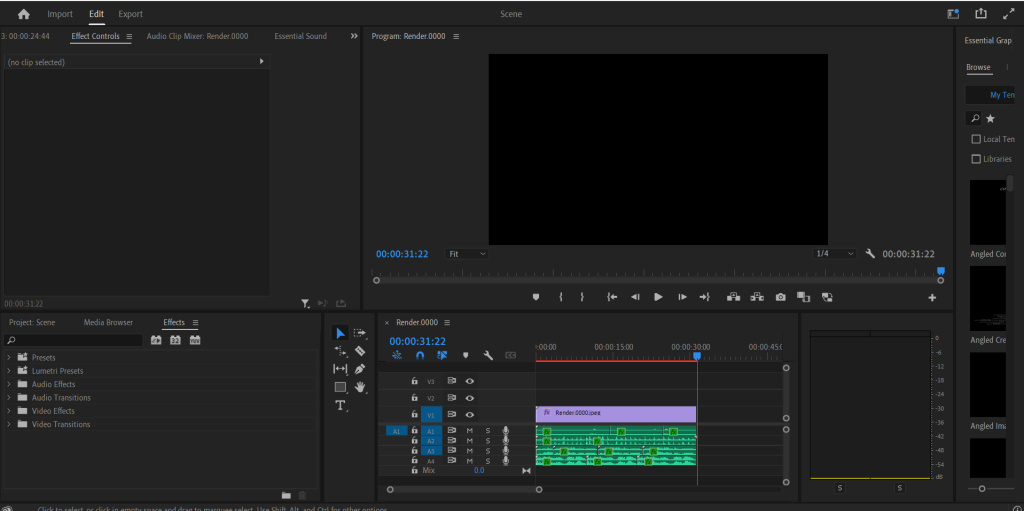
Rendered and the sequence was saved the final part of the this process i wanted to add some sound as i felt I’ve got this far I should make it a whole finished piece, software i used for this is called premiere pro and this started out being very frustrating, as the video was loading in as 2 and bit hours long and never using this before i was at a loss for what to do but i finally figured out that in the settings it automatically loads in at 1 frame per second and the video was rendered at 60 frames a second, after overcoming that issue i learnt how to apply audio into the the video which was basically just drag and dropping. When finding my first audio clip I wanted to be able to hear harsh cold winds from outside as the camera was quite close to the windows throughout the video and the room was going to be creepily quiet, I could apply settings in this software so make the audio sound as if it was coming from outside, I also wanted slow and steady footsteps to vaguely match the shake on the camera giving the illusion someone is recoding this footage further sold this illusion with the wooden floor sounds too which i applied a slight echo to which amplifies an eerie atmosphere for the scene, following this idea of someone recording this creepy cottage i added a faint nervous breath just behind the camera giving the idea the video only just was able to pick the voice up; final sound I added was static from the flickering light which is usually associated with a place not being looked after, abandoned which was done to tie in with my sub-theme.