Winchester rifle
The Winchester Rifle was first founded in 1860 and was actually a development from a previous rifle named the Henry rifle, they were made by a company called Winchester repeating arms company. In particular the 1873 rifle won an award of ”gun that won the west” and it was the first commercial rifle to sell up to 7 million copies; people liked this rifle so much because it was one of the first rifles that didn’t need to stop and reload after a single fire, during this time people like cowboys and native Americans would be using these and earned a reputation as a durable hunting rifle. Usually these rifles used 44 Henry cartridge and was built with a bronze alloy frame that had improved magazine and wooden frame, this would later go on to be a steel frame in 1873 and either 44-40 cartridge. I feel like it is important to understand the history and story behind the model I a producing because this can impact firstly how I design the model and how I texture it. For example now knowing the time period in would this rifle was made in I can think more about what type of wear and damage the weapon might be textured with or the engraving style I would like to put on the model so it matches the time period correctly.
Theme
heading into this assignment the themes i planned to use were Historical and beauty for this particular assignment; i chose to head with these particular themes because i felt as if these would be a unique combination of themes to put together and a pair that not many people would of chose to go with. These two themes relate to my outcome of this assignment in these ways, the Winchester itself is a very old rifle which has a well known history behind it and is fair to suggest many people have either heard of it or seen this rifle before. However, I chose beauty to tie into this project as the sub-theme which could be confusing for a gun but through my research of this rifle, people use to engrave art within the rifle itself this spans from dates, patterns, images of people or animals as it was known as a hunting rifle, therefore this relates back to the ub-theme and also makes my overall model standout.
Modelling process

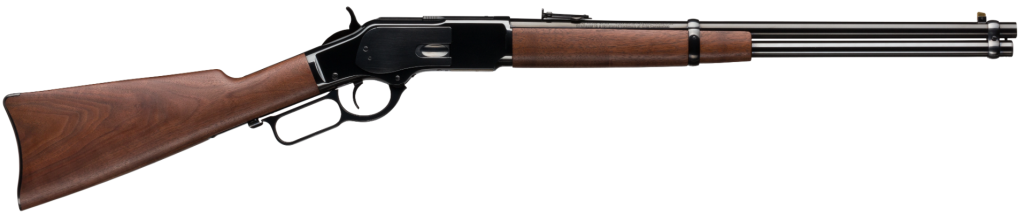
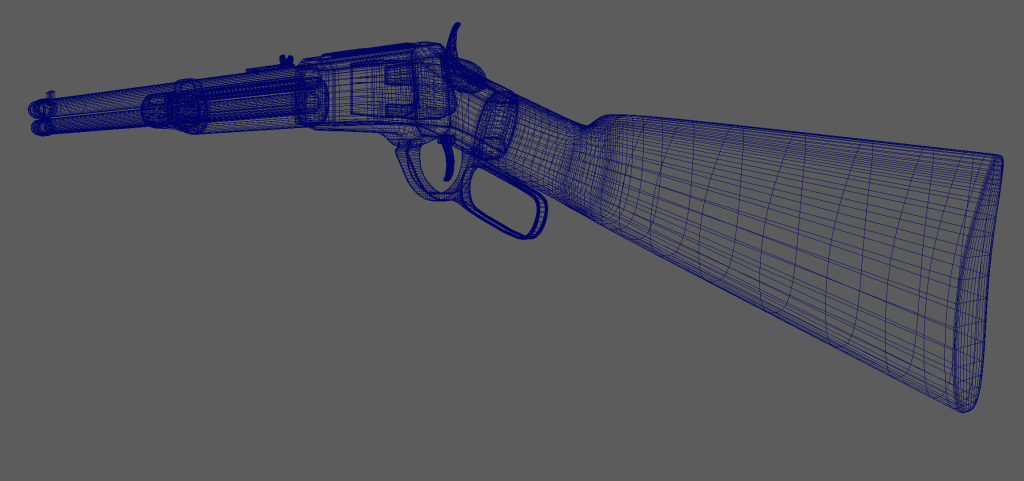
The thing I like to do when going into modelling a new object is to learn about what the item is made up of, I do this because this allows me to understand how I am going to approach the blocking out stage, I do this by looking through pictures and forming my picture collage to assist me through this process. What I saw in the Winchester rifle is there was roughly about 10 different components; obviously that is ignoring what is within the rifle. Once in maya, I change my view port from perspective to front facing so this I could import the image above and sort of use it for tracing the model, I do this for two reasons the first one being so that the shape of the gun is as accurate to the real this as I could possibly get it and the second reason being so all of the proportions are correct and nothing looks out of place.
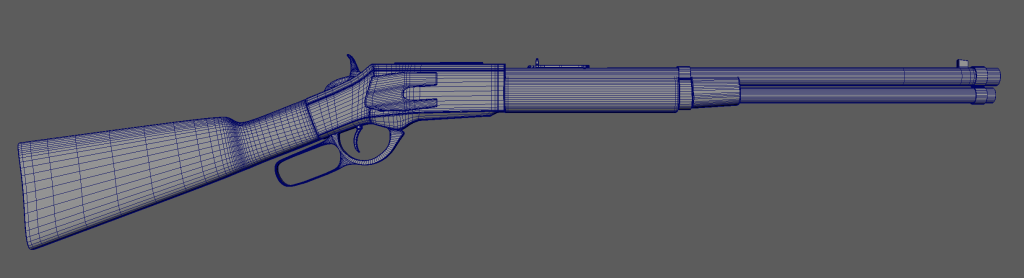
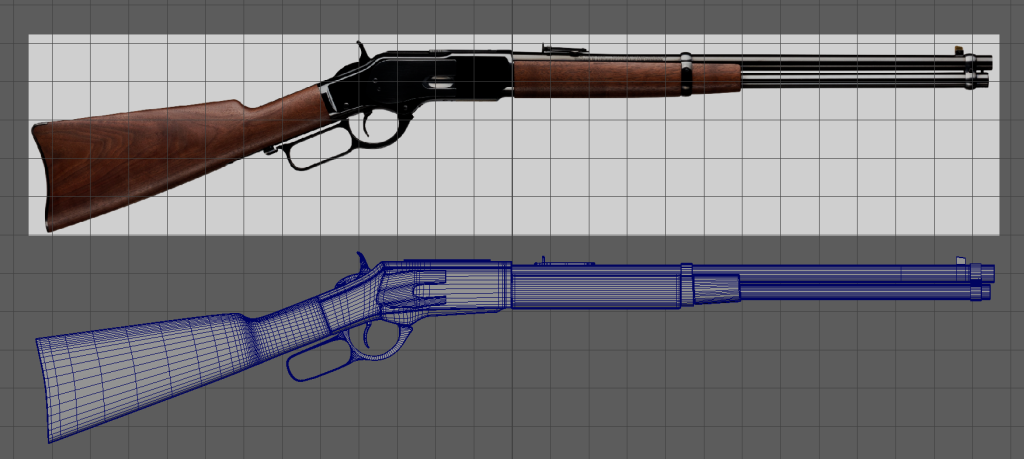
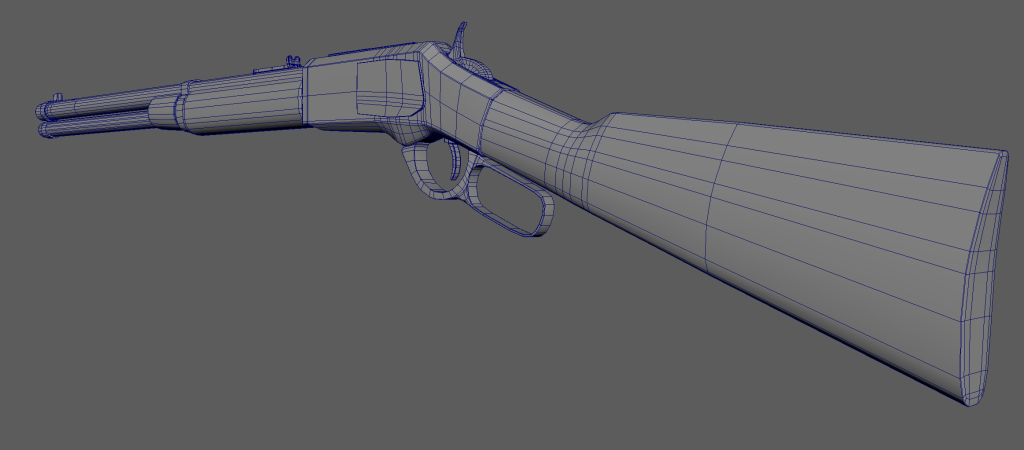
How I manipulate the shapes into what I wanted was but moving and extruding the edges, vertex and faces so that they match the image I am using as the reference, something which really helped me manage this was only using wireframe so I was able to see both the image and the model outline at the same time, to also speed up this blocking out process turning symmetry on dramatically helped me. After getting the general shape and proportions down on it was time to add more detail and how I was going to do this was smooth and sharpen edges on the entire model, to keep a part of a model nice and sharp what I did was put supporting edge loops this tells the software when smoothing out the model you want to keep it sharp the closer and more supporting edge loops are to the edge the shaper it will be. Doing this smoothing out technique is a crucial part of the model because if your topology on the model is wrong or faulty it will show and will ruin the model so I had to be careful with that.


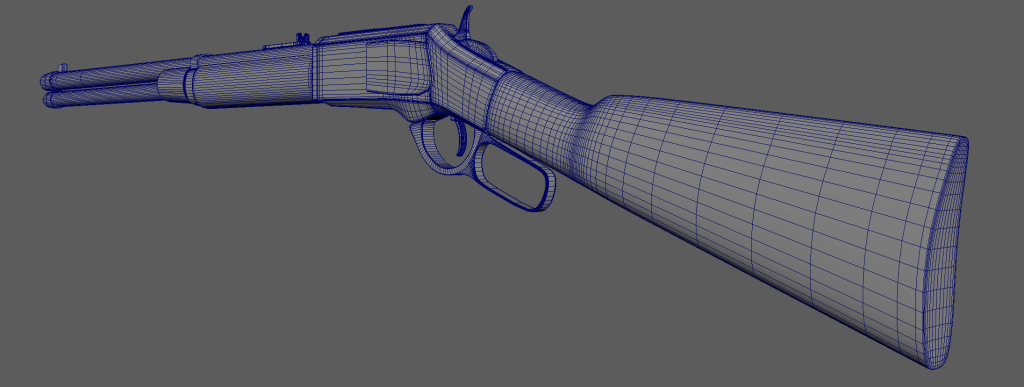
Once smoothed the entire model out, it is looking realistic and exactly how I was aiming for it to be, however this isn’t the end of modelling out the Winchester rifle, before texture there was a still a few steps left. So far I only had a high poly model, which is a model that has either too many polygons or polygons that just aren’t necessary, so I duplicated the entire gun and grouped them both separate one being the high and one being the low just so I can easily identify them later. With the low model I had to hand pick each and every edge loop that wasn’t contributing much or anything to the model itself but still keeping a general shape, this can take a will because you don’t want to take too much but you can leave a lot, this is good practice for the gaming industry as I would have a polygon limit with my models, the image below is after I had cleaned up the polygon count as you can see is a lot different to the high polygon model.


Uv unwrapping was the next stage of the modelling process within maya and is usually not my favourite part however with this particular model I was really enjoying doing it. What unwrapping the Uvs of a modelling is making the model into a 2d format so that the software can understand where to apply the textures onto the model it is vital that when unWrapping the Uvs they are done correctly and in a high resolution, this was important for this model because I was going for as realistic as I could. How I did this was using tools like cutting and sewing and this is used along the edge loops, I try and consciencely pick discrete areas to cute the Uvs because there is a chance they can be seen when texturing and there not much I can do about that so putting them where is hard to see anyway is the best option, got to make sure that the resolution on each Uv cell I make is consistent throughout so different part aren’t for example in 4k and other are in 144p because that would look odd and unrealistic.
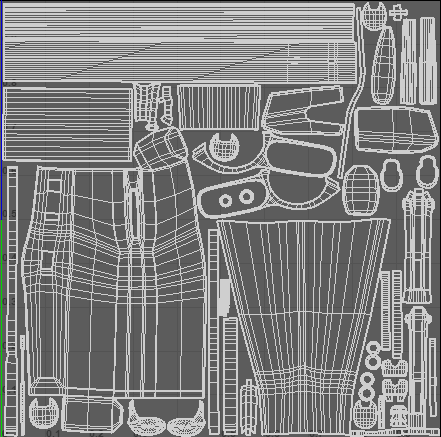
Thankfully I don’t have to unwrap both the low poly modela dn the high poly model so onec I had that finished I was able to export both into substance painter which is where models are able to get textured and so before I did that I create both of these picture collages to help me texture in a realistic way, I feel like it is imporant to explain my thought process for both of these collages therfore the first one I was keeping in mind that I am able to use layering in substance painter so knowing what the base materials are for the metals and wood was helpful for example if my trigger was painter red but it was old and worn I now understand the what the base metal looks like and I could have ishowinh through where the red paint has be en worn off over time and that is generally what I was aiming for with the first collage.
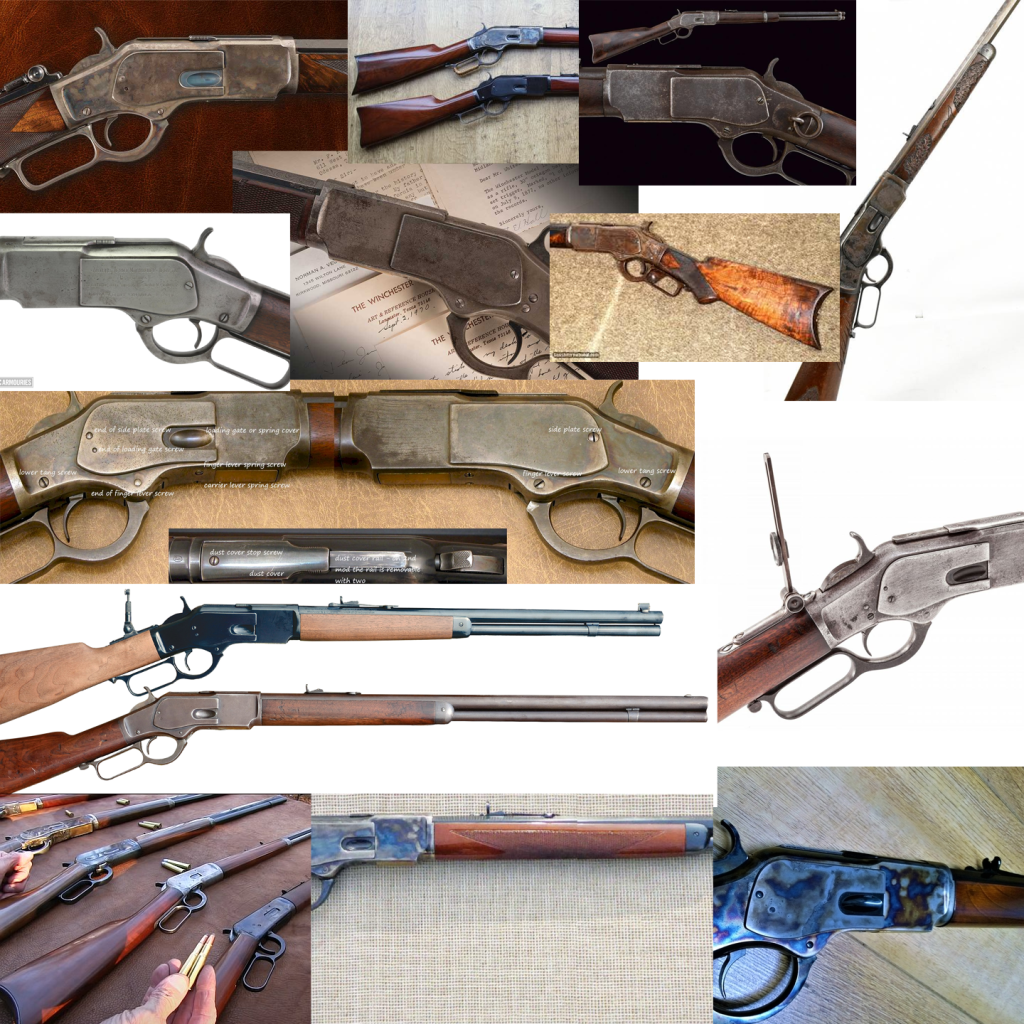
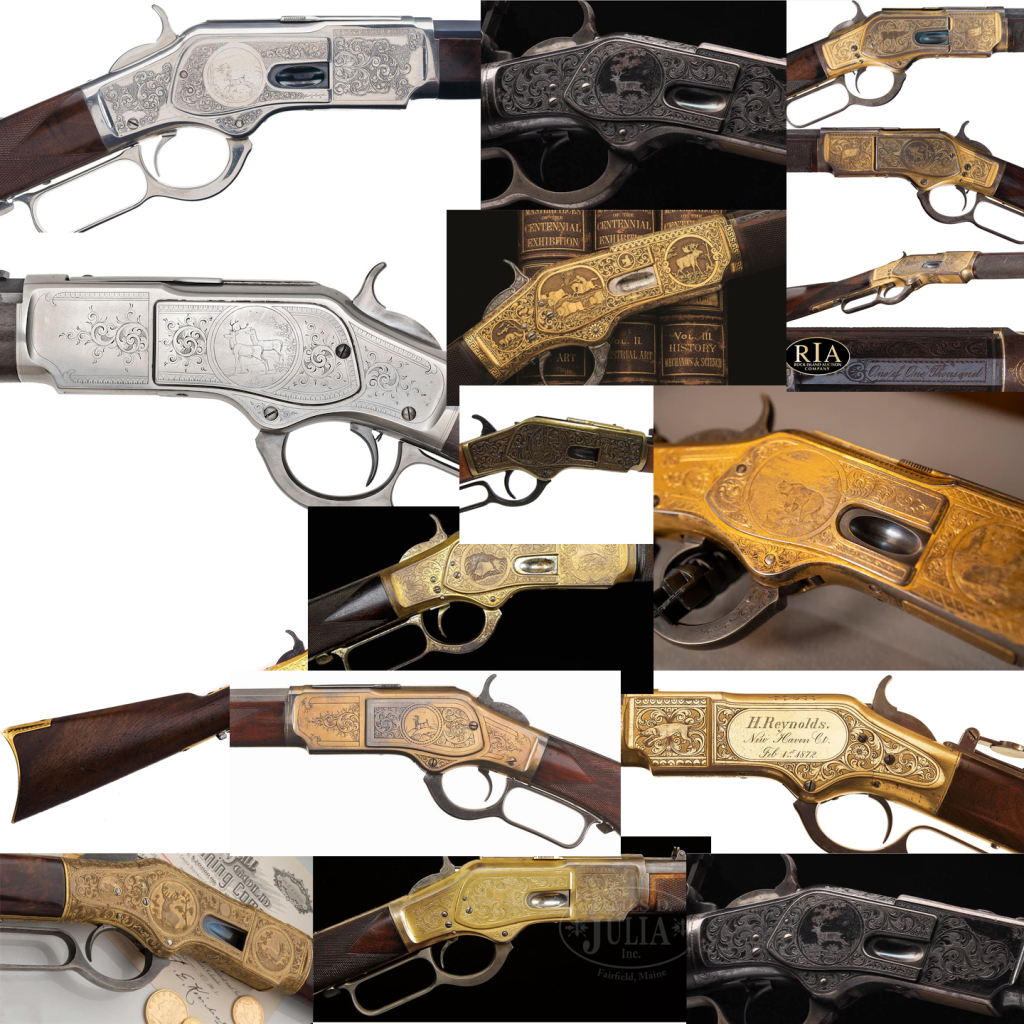
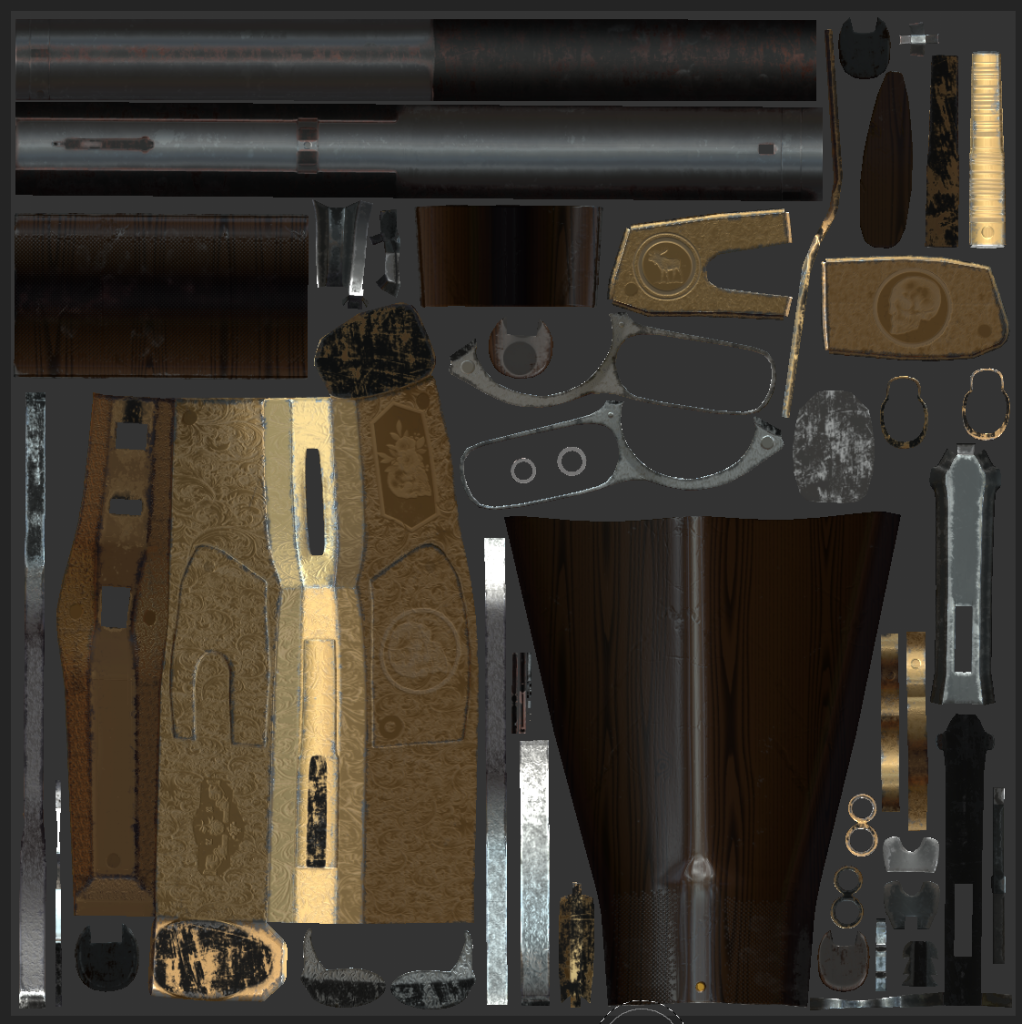
With the second collage you can see more impressive ‘show gun’ style which I was intruded with because of the amount of detail and art that were carved into these wepon and was something I definitely wanted to experiment with in my model, I would be looking for what type of carvings would be on the weapons, the meanings behind them if they did have any and something I felt was really important to see was if there was any date, serial number just to exaggerate and keep a consistent realistic theme in my model. Before bringing these ideas to light I imported the Obj files first the low poly but so I could get the more detail I had to bake the high onto the low which is basically the software creating the illusion of the model being high polygon. As I was saying before I knew I wanted to use the fact I could exploit laying techniques which is shown in the images below, I used the basic tools to start of with like messing around with the opacity of the shades, hand painting certain detailing’s and applying materials in but it got to a point where I had to use some tools that especially come with using substance painter one I really enjoy using as I feel it can make a model seem more realistic is grunge maps and these are when you apply a texture you can add a black mask with hides the material applied but put a grudge over it for example, a dirt grunge map will show the material only where dirt may still be like in the edges of a corner or the inside of a barrel and the software is able to calculate this due to when I baked it previously. Obviously doing this I am able to alter the setting completely, like the grunge amount, how intense it is and many more.
Like everything though there are pros and cons with using these, they can become receptive and then that can be bad as it can eventually leave the model looking un realistic so drawing on my own dirt for example by hand for the model along side the grunge maps help break the feeling of it looking fake. Talking about hand drawing I also used Alpha cuts which I made to make the patterning/ engravings through photoshop which I sent back in substance painter to apply to the alloy of the rifle using height and slightly darker colour to show fake the depth of the engraving.
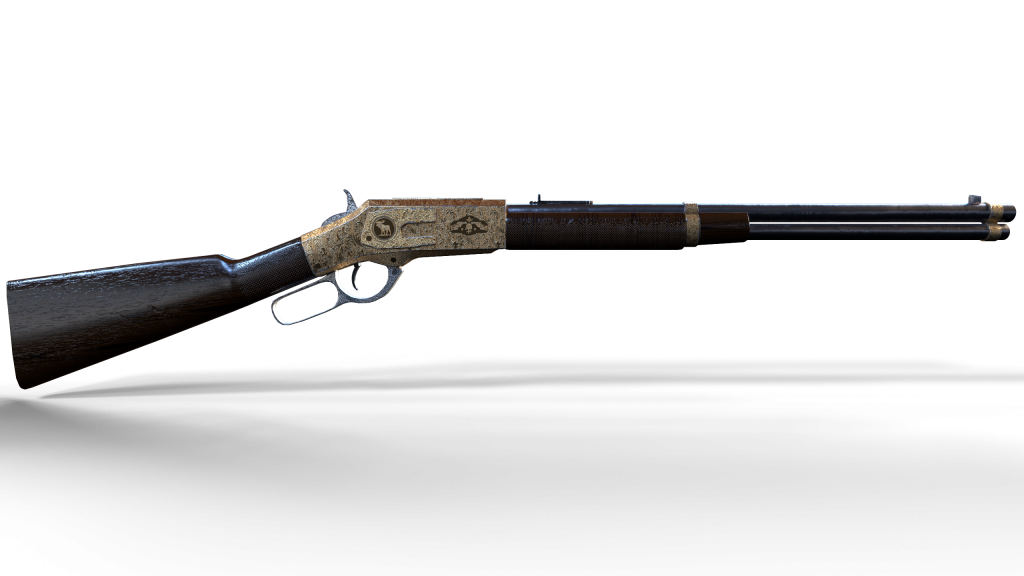
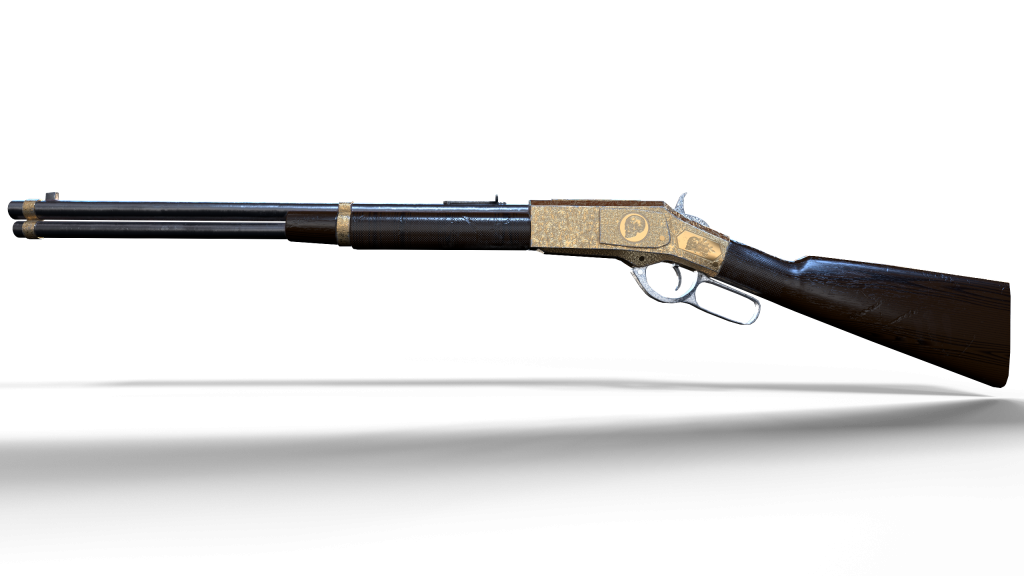
On the body of the rifle I made subtle engravings to show the date of the rifle in which it is made as most of my research of the rifle has somewhere it shows this, all the rifles had polished wood but I wanted to show that it isn’t brand new, so lowing opacity and raising roughs lowered the shine on these parts, I also applied slight splits in the wood to make it seem more believable. In turns of texturing the barrel I didn’t really want this to be the focal point of the object so making it look plain worn/ tired steal still went with the textures of the gun and didn’t draw attention from the engravings. Nearing the end of texturing the rifle I noticed some of the rifles i had in my collage has grips around the handle and I thought this would look really effective especially with the right lighting so I added them using an alpha i made where hands would be holding the rifle.
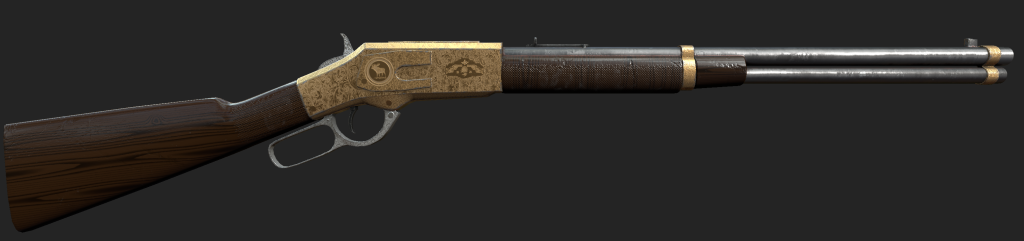
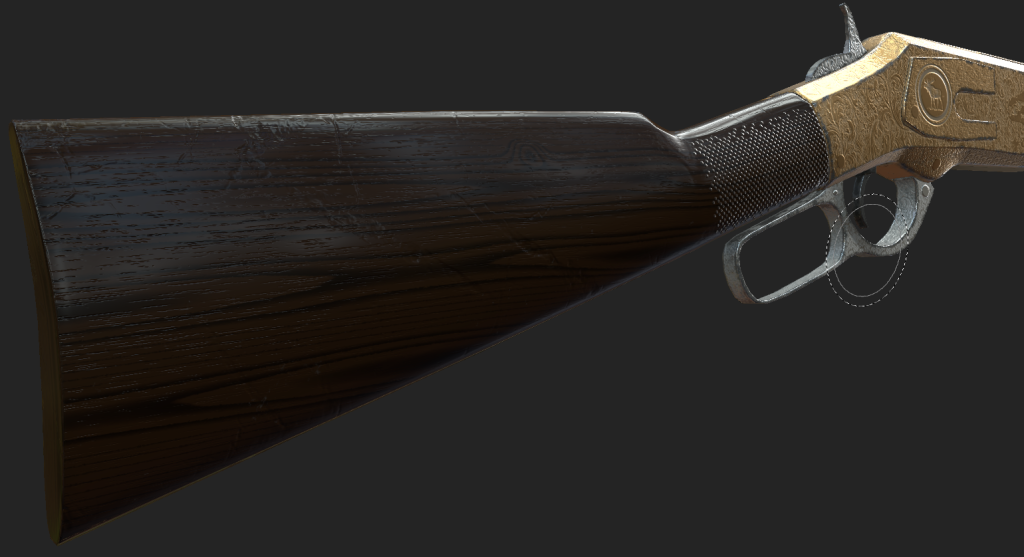
This is the end result of the model after being all textured however this isn’t a rendered image yet as you can see I tried to keep a slight glossiness on the wood show the gun has been looked after over the time, closer look there is some wear and tear on the would alongside the wood pattern I notice a lot had in my references and companied with the slight wood splits and grips. I liked the use of both silver and golden colour mainly because I would struggling to decide what to go with, came to a conclusion that gold was more valued back in that time period, hard to see in this mage but there is wear on the edges and slight dirt build up.